
Learn to Crochet Santa for Christmas – Easy & Free Crochet Pattern
Make an adorable mini Santa Claus ornament with this easy Christmas crochet tutorial! This free crochet Santa pattern is perfect for handmade Christmas decorations, festive keychains, stocking stuffers, and thoughtful holiday gifts.
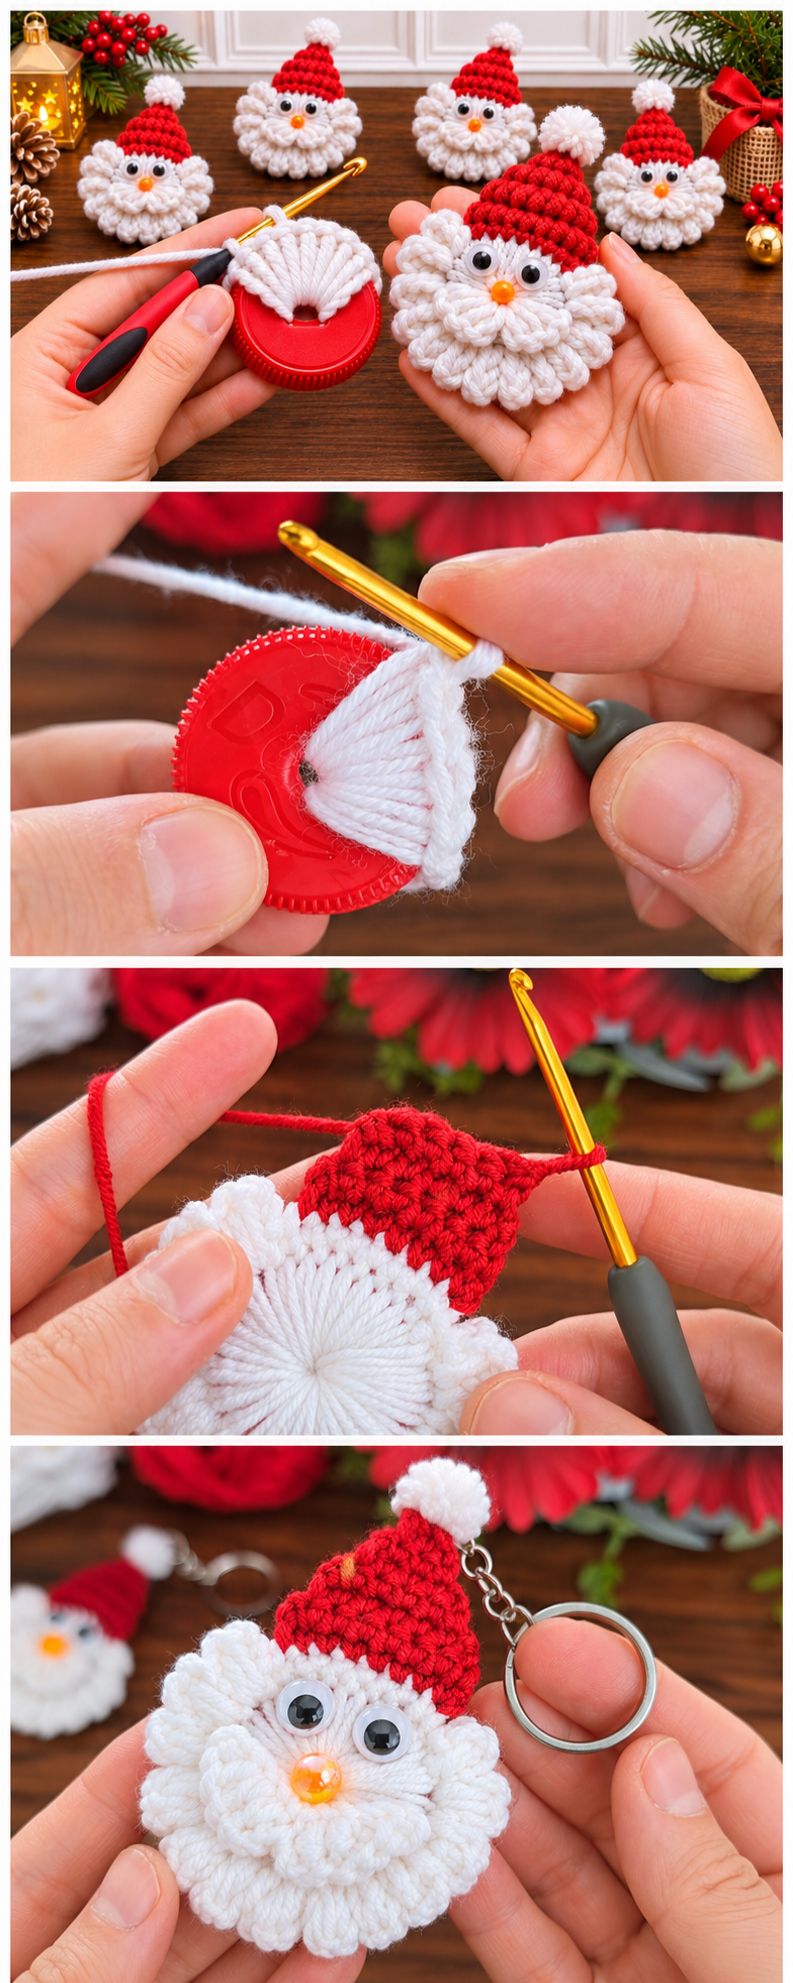
Christmas is the perfect time to get creative with yarn, and what could be sweeter than a tiny handmade Santa Claus?
With his fluffy white beard, bright red hat, cute little nose, and cheerful eyes, this mini crochet Santa is guaranteed to bring a little Christmas magic to your home.
The best part? You only need a small amount of yarn and a few basic crochet supplies to make one!
Whether you’re decorating your Christmas tree, making handmade gifts, or looking for a fun holiday crochet project, this adorable Santa is a wonderful choice.
In this tutorial, you’ll learn how to crochet your own miniature Santa ornament step by step.
Why You’ll Love This Crochet Santa Pattern
- Beginner-friendly: Uses simple crochet stitches and easy shaping.
- Quick to make: A small project that can be completed in approximately 30–60 minutes.
- Scrap yarn friendly: Perfect for leftover red and white yarn.
- Versatile: Turn your Santa into a Christmas ornament, keychain, gift topper, or festive garland.
- Adorable details: A fluffy white beard, classic Santa hat, and playful facial features.
Once you’ve made your first Santa, you’ll probably want to create a whole collection!
Materials You’ll Need
Before getting started, gather these supplies:
- Red yarn for Santa’s hat
- White yarn for Santa’s face, beard, and pom-pom
- 3.0–3.5 mm crochet hook (adjust to your yarn)
- Yarn needle
- Scissors
- Two small googly eyes or black beads
- Small orange bead for Santa’s nose
- Stitch marker (optional)
- Keychain ring or hanging cord (optional)
- A small amount of fabric glue (optional)
Finished size: Approximately 6–8 cm tall, depending on your yarn, hook size, and beard length.
Skill level: Adventurous beginner
Crochet Abbreviations (US Terms)
| Abbreviation | Meaning |
|---|---|
| MR | Magic Ring |
| ch | Chain |
| sc | Single Crochet |
| sl st | Slip Stitch |
| inc | Increase (2 sc in one stitch) |
| dec | Decrease (sc2tog) |
| st | Stitch |
| sts | Stitches |
| FO | Fasten Off |
Special Stitch – Loop Stitch (LS): Insert your hook into the next stitch. Wrap the working yarn around your index finger to form a loop approximately 1.5–2 cm long. Catch both strands with your hook and pull them through the stitch. Yarn over and pull through the loops on your hook to secure the stitch. Repeat to create a fluffy texture.
Keep your loops approximately the same length for a neat, even beard.
Free Mini Crochet Santa Pattern
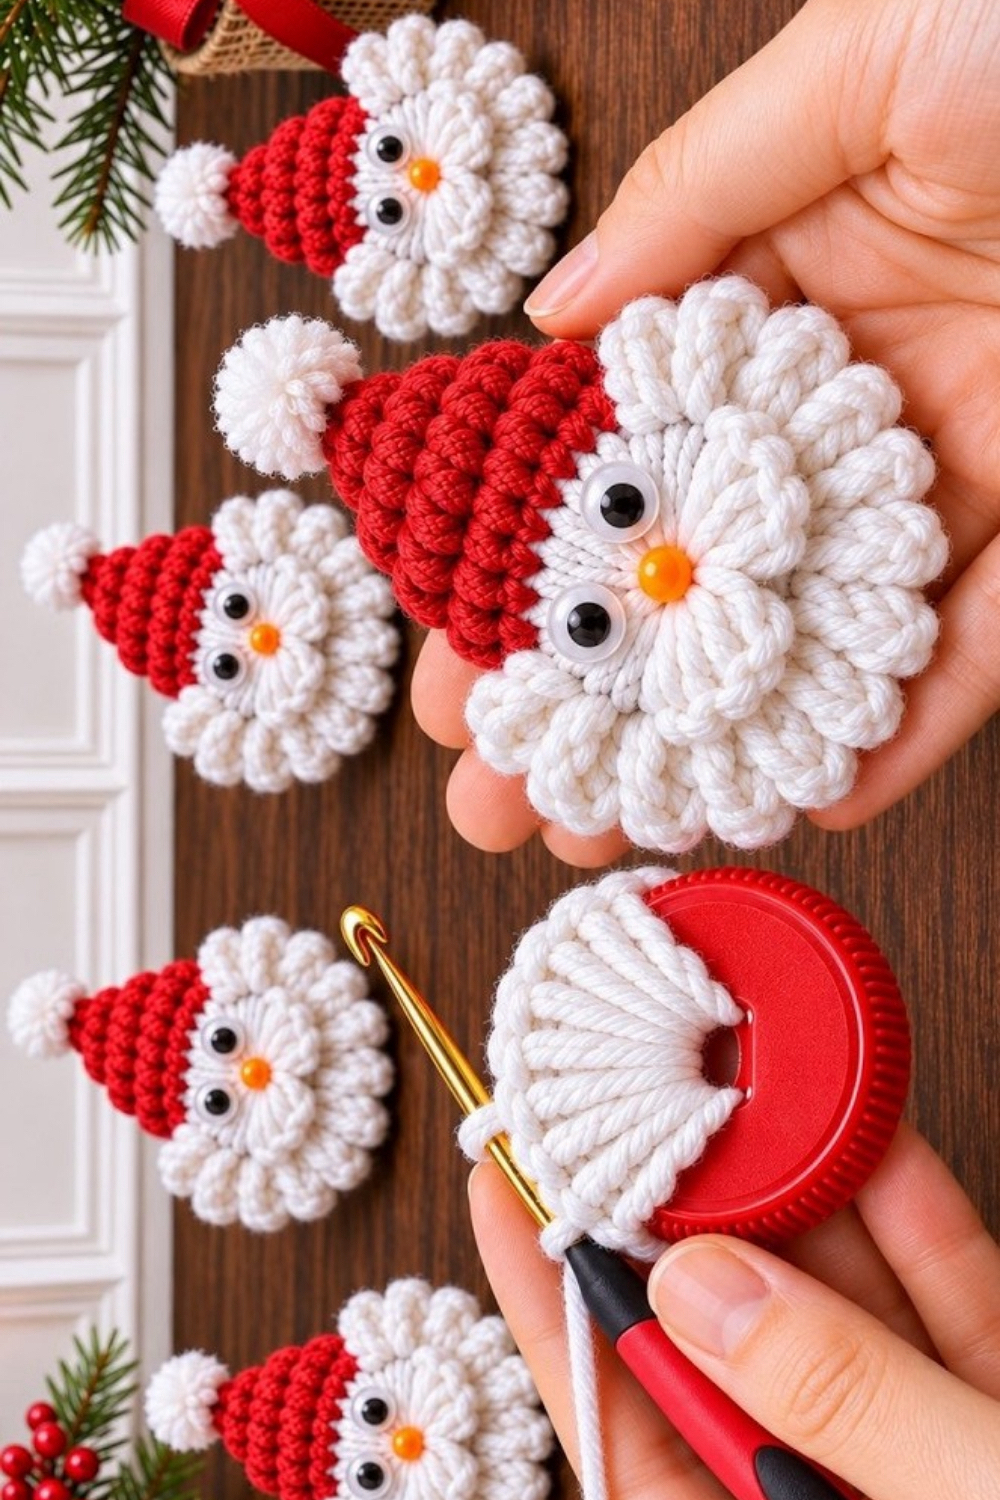
This pattern creates a flat, lightweight Santa face with a textured white beard and a separate red hat. It is inspired by the fluffy Santa ornament shown in the tutorial photos.
Step 1: Crochet Santa’s Face
Using white yarn, begin with a magic ring.
Round 1: Work 6 sc into MR. (6 sts)
Round 2: Inc in each stitch around. (12 sts)
Round 3: 1 sc, inc; repeat around. (18 sts)
Round 4: 2 sc, inc; repeat around. (24 sts)
Round 5: 3 sc, inc; repeat around. (30 sts)
Round 6: Sc in each stitch around. (30 sts)
Sl st into the next stitch and fasten off, leaving a yarn tail for weaving in.
You should now have a small, flat white circle. This will form the base of Santa’s face.
Step 2: Make Santa’s Fluffy White Beard
Santa’s soft, fluffy beard is what makes this ornament extra adorable!
Using white yarn, attach your yarn to a stitch along the lower edge of the face.
Row 1: Ch 1, work 19 loop stitches into 19 consecutive stitches around the lower half of the face. Turn. (19 LS)
Row 2: Ch 1, work 1 loop stitch into each stitch across. (19 LS)
Fasten off and weave in the ends.
Gently fluff and separate the loops with your fingers to give Santa a full, soft beard.
For an even fluffier look, add a few extra loops to the sides of his face using the same loop-stitch technique.
Tip: Don’t worry if your beard looks a little uneven at first. Once you arrange the loops, it will become wonderfully fluffy!
Step 3: Crochet Santa’s Red Christmas Hat
Now it’s time to make Santa’s classic red hat!
Using red yarn:
Row 1: Ch 12. Starting in the second chain from the hook, work 11 sc. Turn. (11 sts)
Row 2: Ch 1, sc across. Turn. (11 sts)
Row 3: Ch 1, dec, 7 sc, dec. Turn. (9 sts)
Row 4: Ch 1, sc across. Turn. (9 sts)
Row 5: Ch 1, dec, 5 sc, dec. Turn. (7 sts)
Row 6: Ch 1, sc across. Turn. (7 sts)
Row 7: Ch 1, dec, 3 sc, dec. Turn. (5 sts)
Row 8: Ch 1, sc across. Turn. (5 sts)
Row 9: Ch 1, dec, 1 sc, dec. Turn. (3 sts)
Row 10: Ch 1, sc across. Turn. (3 sts)
Row 11: Ch 1, sc3tog. (1 st)
Fasten off, leaving a long tail for sewing.
Your Santa hat should now have a cute triangular shape.
For a slightly curved Santa hat, gently bend the narrow tip toward one side when attaching it.
Step 4: Make the White Pom-Pom
Every Santa hat needs a fluffy white pom-pom!
Here’s an easy way to make one:
- Wrap white yarn around two fingers approximately 20–25 times.
- Carefully slide the yarn off your fingers.
- Tie another short piece of yarn tightly around the middle.
- Cut through the loops on both ends.
- Fluff and trim the yarn into a small round pom-pom.
Sew the pom-pom securely onto the tip of Santa’s red hat.
Step 5: Assemble Your Crochet Santa
Now comes the fun part — bringing your little Santa to life!
Attach the hat
Place the red hat over the upper portion of the white circle, leaving space below for Santa’s eyes and nose.
Using the long red yarn tail and a yarn needle, carefully sew the hat in place.
Add Santa’s eyes
Position two small googly eyes on the upper white face, just below the hat.
You can attach them using suitable fabric glue or sew on small black beads instead.
Add the nose
Place a small orange bead in the center of Santa’s face, slightly below his eyes.
Sew or securely attach the bead.
Fluff the beard
Use your fingers to gently spread out the white yarn loops around Santa’s cheeks and chin.
Adjust the loops until you achieve a soft, rounded beard.
Your little Santa Claus is now complete!
Step 6: Turn Your Santa into a Christmas Keychain
Want to make your Santa even more useful?
Transform him into a cute Christmas keychain!
- Attach a short, strong yarn loop through the top of Santa’s hat.
- Secure the loop with several stitches.
- Connect a small keychain ring using a metal jump ring or short chain.
- Check that all attachments are firmly secured.
You now have an adorable handmade Santa keychain, perfect for Christmas gifts!
If you prefer a tree ornament, simply replace the keychain hardware with a small hanging loop.
Creative Ways to Use Your Crochet Santas
These tiny Santa ornaments are incredibly versatile!
Christmas Tree Ornaments
Make several Santas and hang them on your Christmas tree for a charming handmade look.
Handmade Christmas Gifts
Attach a mini Santa to a wrapped present or add one to a Christmas gift basket.
Festive Keychains
Turn your Santa into a cute accessory for keys, handbags, or backpacks.
Christmas Garlands
Crochet multiple Santas and attach them to a long piece of yarn to create a festive Christmas garland.
Holiday Craft Projects
Use your Santa ornaments to decorate wreaths, handmade Christmas cards, or holiday table settings.
Tips for Making the Perfect Crochet Santa
Choose soft yarn: A soft white acrylic or cotton-blend yarn creates a lovely fluffy beard.
Keep your stitches even: Consistent tension helps the face stay round and the hat hold its shape.
Experiment with beard length: Longer loop stitches create an extra fluffy Santa, while shorter loops give a tidier appearance.
Use different sizes: Try thicker yarn and a larger hook for bigger Christmas ornaments.
Make matching sets: Create several Santas with slightly different hat shapes and pom-pom sizes.
Safety note: Small beads, plastic eyes, and detachable decorations can be choking hazards. For ornaments intended for young children, use embroidered facial features instead.
Frequently Asked Questions
Is this crochet Santa pattern suitable for beginners?
Yes! This pattern uses basic crochet stitches, simple increases and decreases, and an easy loop-stitch technique. Beginners can practice the loop stitch on a small swatch before starting the beard.
How long does it take to crochet one Santa?
Most crocheters can complete a mini Santa in approximately 30–60 minutes, depending on their experience.
Can I use leftover yarn?
Absolutely! This is a wonderful scrap yarn project because each Santa requires only small amounts of red and white yarn.
Can I make Santa without googly eyes?
Yes! You can embroider two small black eyes using yarn or embroidery thread for a softer, fully handmade finish.
Can I sell the finished crochet Santas?
You can sell finished items made from this original written pattern. If you share the pattern itself, please link back to this tutorial rather than republishing the instructions.
Final Thoughts
Crocheting your own little Santa Claus is such a fun and rewarding way to celebrate the holiday season.
With his fluffy beard, cheerful face, and festive red hat, this tiny Santa makes a wonderful handmade addition to your Christmas decorations.
Whether you’re making one for yourself or creating a whole collection to give as gifts, these adorable crochet Santas are sure to spread Christmas cheer.
Grab your red and white yarn, pick up your crochet hook, and start making your own little Santa today!
Happy Crocheting & Merry Christmas! 🎄❤️
Save This Free Crochet Santa Pattern for Later!
Love this project? Save it to your Christmas Crochet Pinterest board so you can easily find it when you’re ready to start crocheting.
And don’t forget to share your finished Santa creations with other crochet lovers!
More Christmas Crochet Ideas:
- Mini Crochet Christmas Wreaths
- Easy Crochet Snowflakes
- Crochet Christmas Tree Ornaments
- Adorable Crochet Reindeer
- Handmade Crochet Christmas Gifts
Free Video Tutorial:

