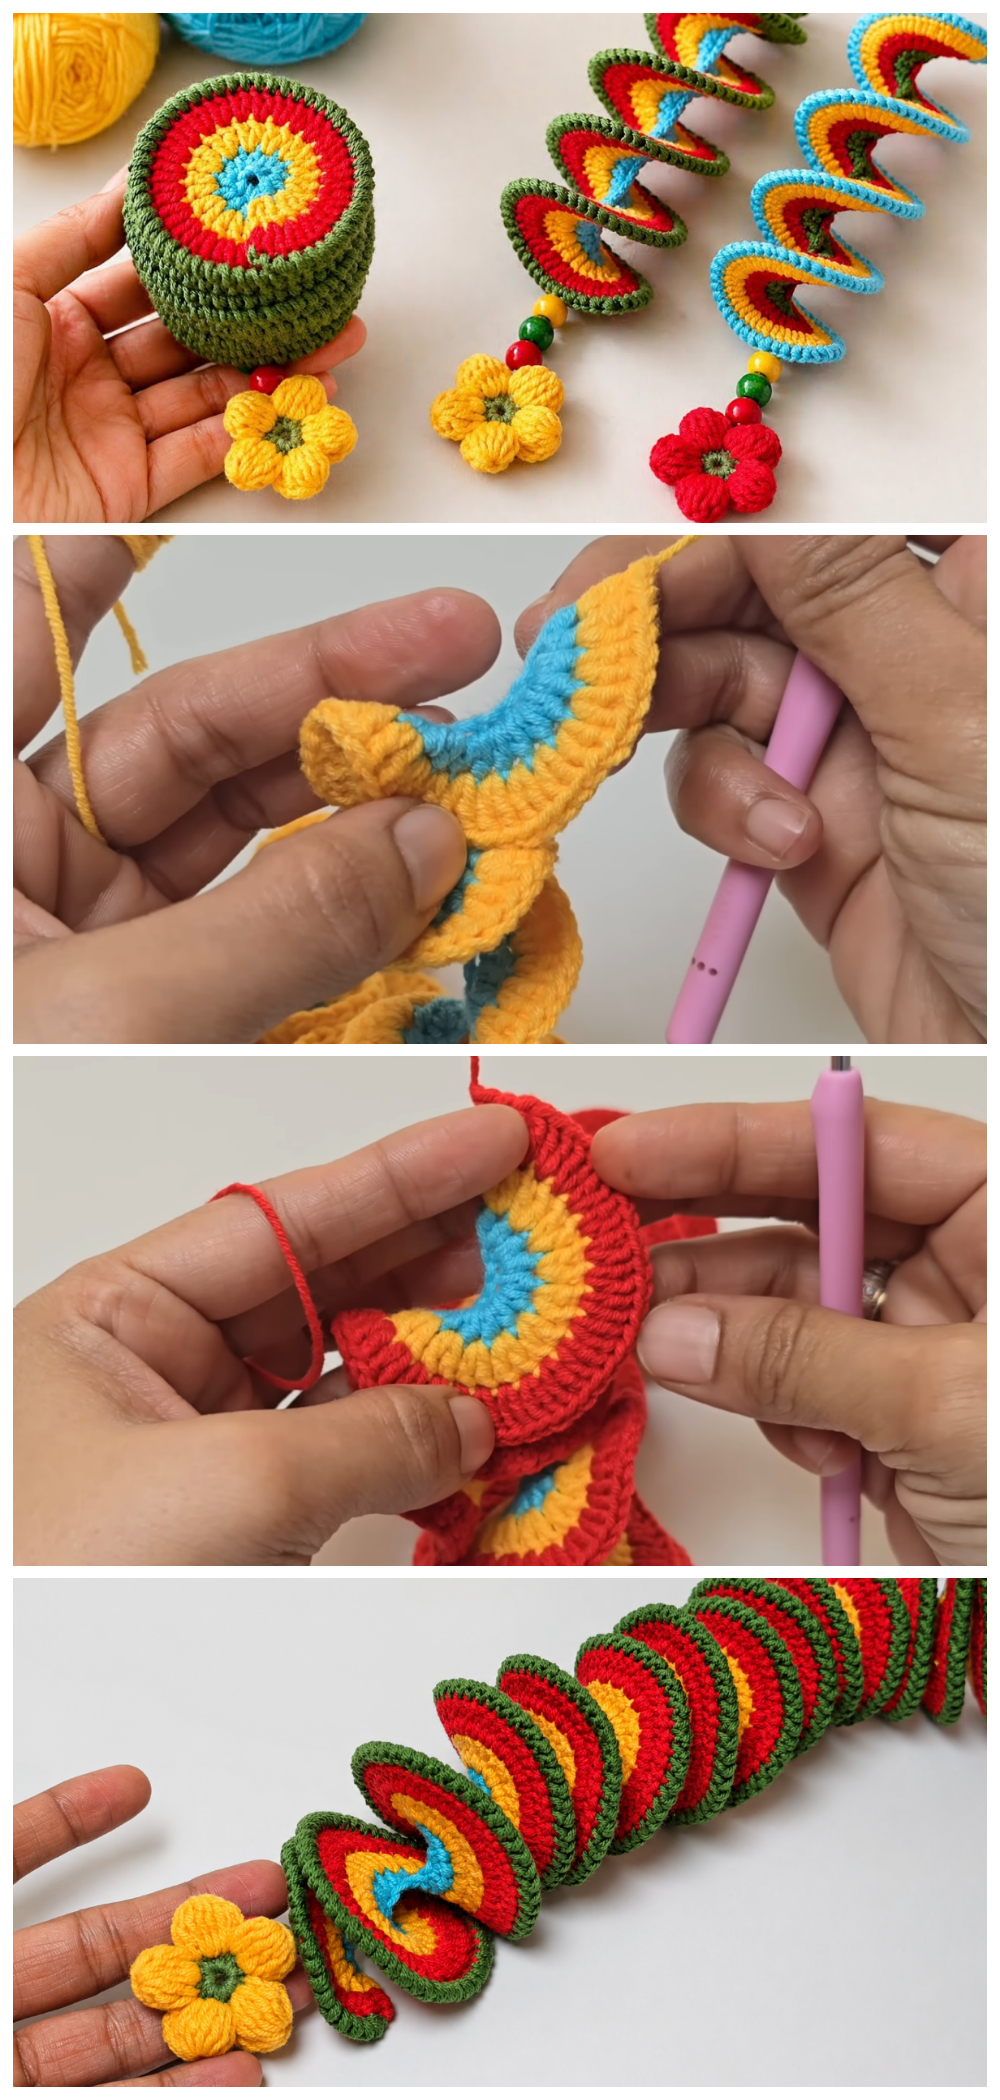
Add a splash of color to your home or garden with this eye-catching crochet wind spinner! This fun project is quick to make, beginner-friendly, and a great way to use leftover yarn. Whether you hang it on your porch, balcony, nursery, or craft room, the spiral design creates beautiful movement with every breeze.
Why You’ll Love This Crochet Wind Spinner
-
- Easy and relaxing project
- Perfect for yarn scraps
- Beginner-friendly stitches
- Great handmade gift idea
- Beautiful indoor or outdoor decoration
- Customizable with your favorite colors
Crochet Stitches Used
- Magic Ring (MR)
- Chain (ch)
- Slip Stitch (sl st)
- Single Crochet (sc)
- Half Double Crochet (hdc)
- Double Crochet (dc)
- Increase (2 sc in one stitch)
Free Crochet Wind Spinner Pattern
Round 1
Create a Magic Ring.
- 6 sc into the ring.
- Join with a slip stitch.
(6 stitches)
Round 2
Work 2 sc in each stitch around.
(12 stitches)
Round 3
1 sc, increase
Repeat around.
(18 stitches)
Round 4
2 sc, increase
Repeat around.
(24 stitches)
Round 5
3 sc, increase
Repeat around.
(30 stitches)
Continue Expanding
Keep increasing each round by adding one extra single crochet between increases until your circle reaches the desired size.
Change yarn colors every few rounds to create the vibrant striped effect.
Creating the Spiral
The magic happens with the edging.
Work around the entire circle:
3 dc in every stitch
or
2 hdc + 2 dc in each stitch
This adds enough fullness for the circle to naturally twist into a beautiful spiral.
If you want a tighter spiral, crochet 4 double crochet stitches in every stitch.
Free Video Tutorial: